Learning Objectives
After completing this lesson, you'll be able to:
- Identify JSON elements from an incoming Trigger message.
- Configure the Automation to run a workspace in response to a Trigger using part of this message.
- Chain actions by passing an element of the incoming JSON through a filter.
Resources
Introduction
As a technical analyst in the GIS department, you have noticed the inefficiency of manually updating the corporate database. After learning about Automations in FME Flow, you believe it is feasible to establish a system that automates this process.
So far you have set up a system for added file notifications to be registered by FME Flow. You've been provided a workspace to process this and need to publish it to FME Flow. The workspace must then be triggered by the Resource or Network Directory (updated) Trigger in Automations.
You may have noticed that the Log Action in Automations actually submits a workspace to process this request. Therefore we have already, perhaps unknowingly, covered how to set up this response. Now it's time to create a new workspace to align with your overall goal: to provide real-time updates to your corporate database.
1) Open Workspace and Inspect Data
Download the workspace (C:\FMEData\Workspaces\AutomateWorkflows\exercise-process-resource-or-network-directory-messages-complete.fmw)
It doesn't matter which Shapefile is set as the source data right now. At runtime, the source dataset will be replaced by the file path recorded in the Resource or Network Directory (updated) message from the Automation Trigger.

Run the workspace. Once it completes, you can click View Written Data... on the building_footprints feature type to open the dataset in Visual Preview.

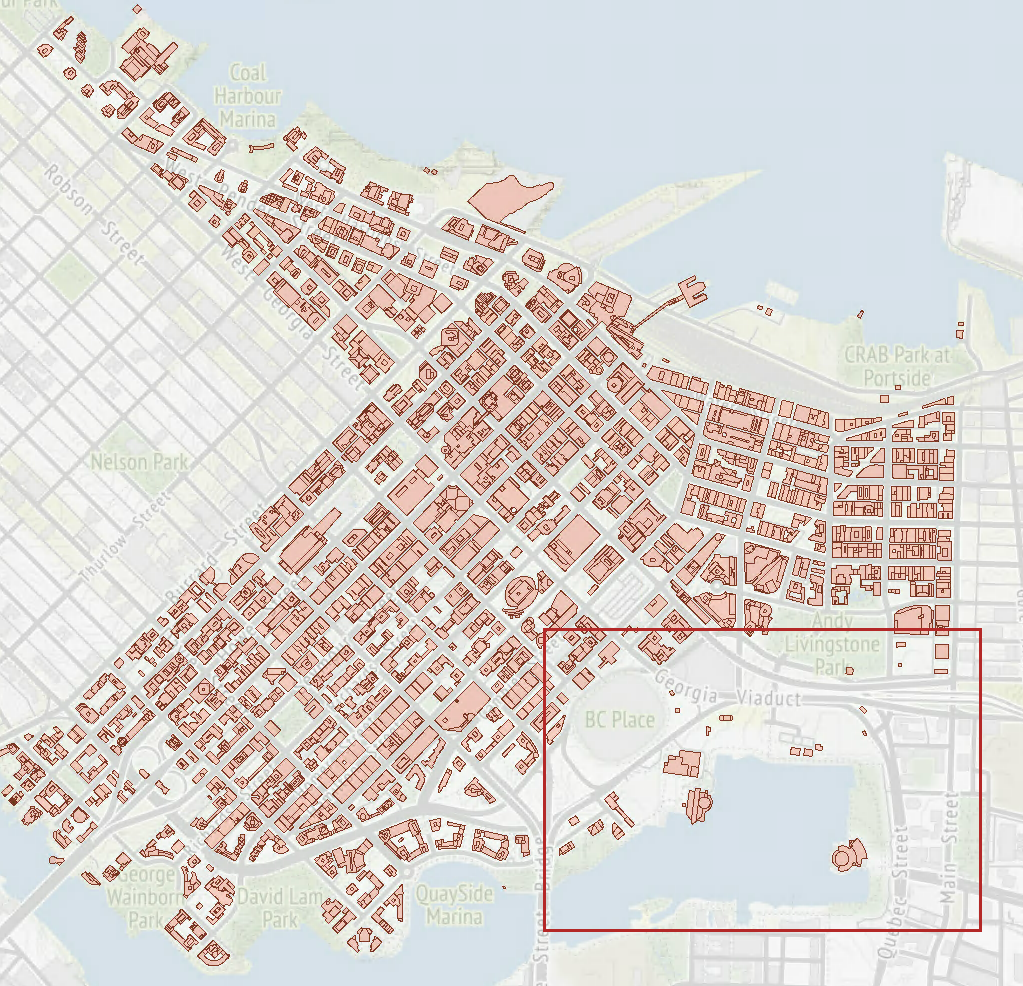
There is already data in the building footprints layer, but we should note what the data looks like so we will know where it has changed once we update the dataset with the new data. The area within the red box will be where the new data will be added:

4) Publish Workspace
Save the workspace as exercise-process-directory-watch-messages-complete.fmw and publish it to the Training repository in FME Flow. We only need it to be run (not do anything special) so register it with the Job Submitter service.
5) Add Dataset to FME Flow
Since this Automation aims to update our database, let's ensure that it is accessible in FME Flow. To do this, we will upload the buildingfootprints.gdb file geodatabase to FME Flow's shared resources.
Use the FME Flow web interface to create a new folder Output in Resources > Data and upload the database (C:\FMEData\Data\Engineering\BuildingFootprints\buildingfootprints.gdb).

6) Edit Automation
Navigate to the Automations: Manage Automations page and select Incoming Building Footprints to open the Automation for editing. Before you can make any changes stop the Automation using the button in the top right corner. Instead of adding a new action node, simply select the Log node and change the Action parameter value to Run a workspace.
Select the Training repository and workspace uploaded in the previous step. The parameters should now include one for the Source Esri Shapefile and the output database.
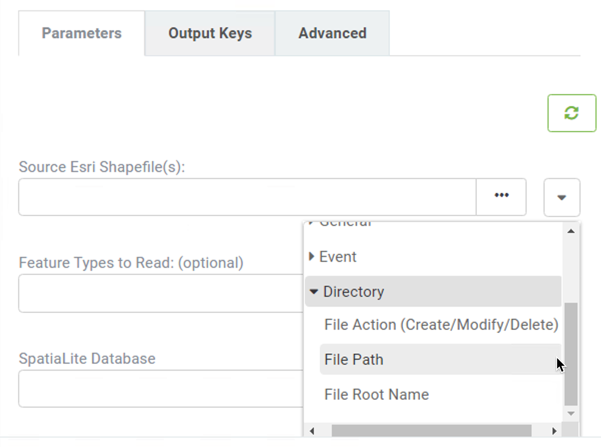
The source dataset must pick up the file path from the Resource or Network Directory (updated) trigger. From the drop-down menu next to Source Esri Shapefiles(s), select File Path found under the Directory folder. This drop-down list is essentially the JSON flattened into its separate components.

For File Geodatabase, browse to the Resources/Data/Output folder to locate the buildingfootprints.gdb uploaded in the previous step.:

7) Add Filter
The Esri Shapefile Reader will only accept .shp file extension types. However, the Resource or Network Directory (updated) Trigger will pass a message to the workspace for every file uploaded. To prevent the Automation from triggering database update workspaces that will fail, add a Filter action so that only the file path containing .shp is parsed to the Run Workspace action.
Select the plus icon at the bottom of the canvas and drag an internal action (orange) onto the canvas.
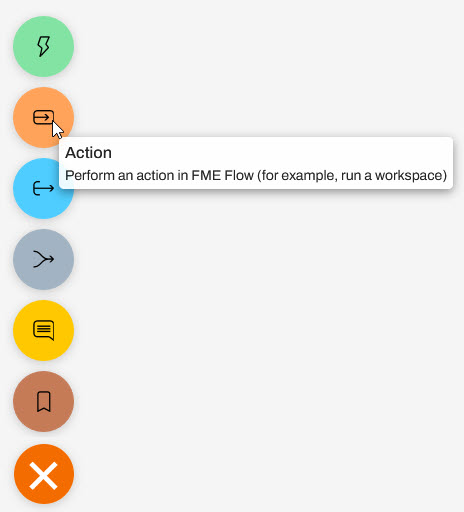
Move the connection lines so that the Network Directory (updated) Trigger Success Output port enters this new Action node, and the Run Workspace is connected to the Success Output port of this action.

Click on the action to configure the filter and set the Action to Filter messages. There are two parameter values required. Similar to how the Source dataset of the workspace was set, specify the File Path as the Key. In Contains, set the string to search for to .shp.

Click Apply to save the changes. Click Start Automation again to restart the automation.
8) Test Solution
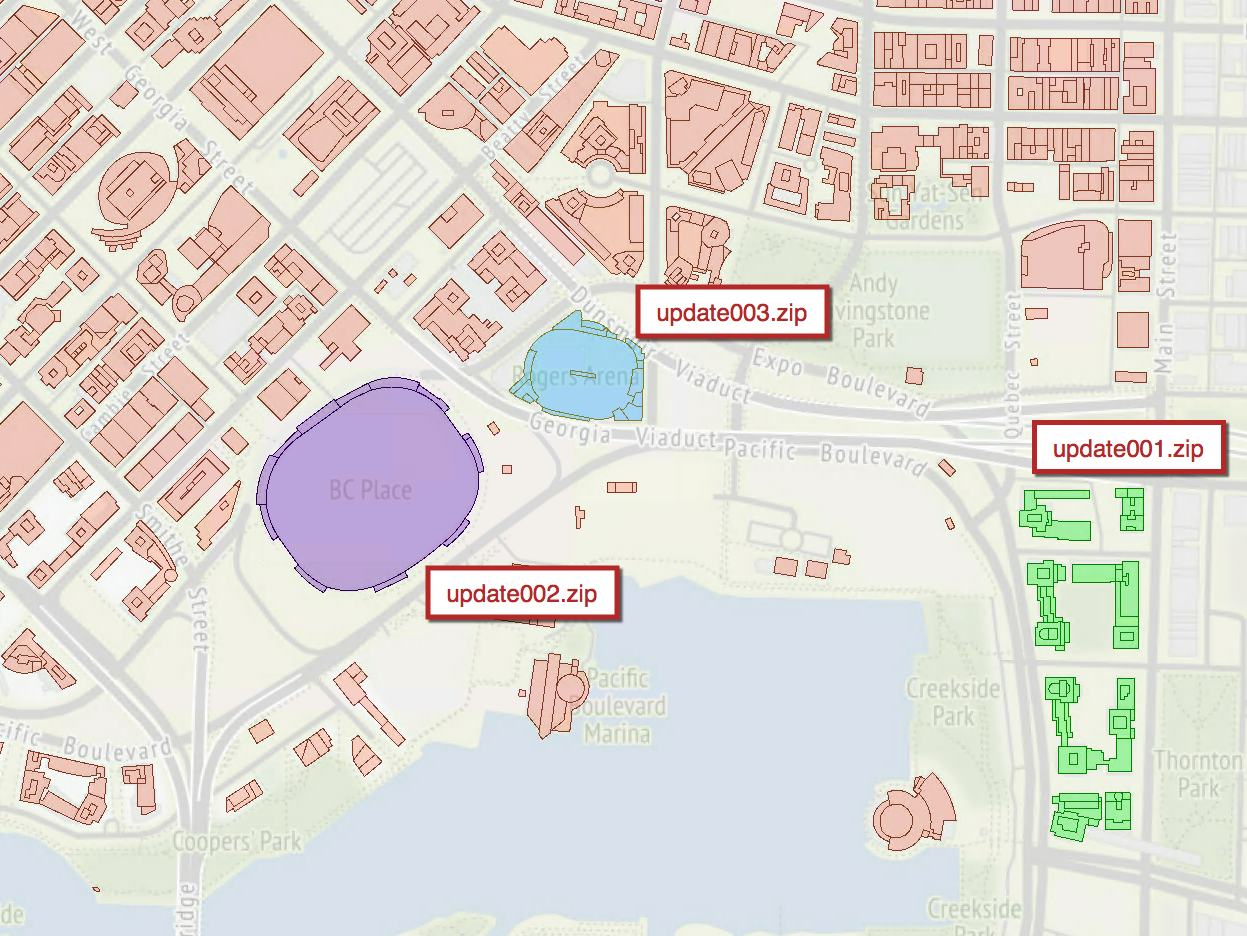
Test the solution by putting update001, update002, or update003 .shp/.dbf/.shx/.prj files into the BuildingUpdates folder. If these files already exist from an earlier exercise, delete them first, then re-add them. You will find that each dataset put into the folder is added to the geodatabase.
Check the Completed Jobs page to confirm that the workspace was run. Alternatively, you can check the Automation Log or Triggered Job log to watch the progress of the Trigger > Job Submitted > Translation Successful.
9) Inspect the Output
Navigate to the Output folder in Resources and select and download the building footprints.gdb. Once it has been downloaded, unzip the folder. In the FME Data Inspector, click Open, set Format to Esri Geodatabase (File Geodb Open API), click the ellipses and navigate to the buldingfootprints.gdb that was just downloaded. In the Parameters, make sure the Table is bulding_footprints. Click OK.
Depending on which update file you added, you should see one of the three buildings added to the dataset: